Cyber Services / All lessons / CCNA — Hands-on Labs / CCNA Complete Lab Workbook

CCNA Complete Lab Workbook

Module 1 of 1 · 2 min read · Free to read

MODULES ↓ Command blocks have a COPY button

Complete Practical Lab Library

All 64 Network Topologies for Comprehensive Training

AAA & Security
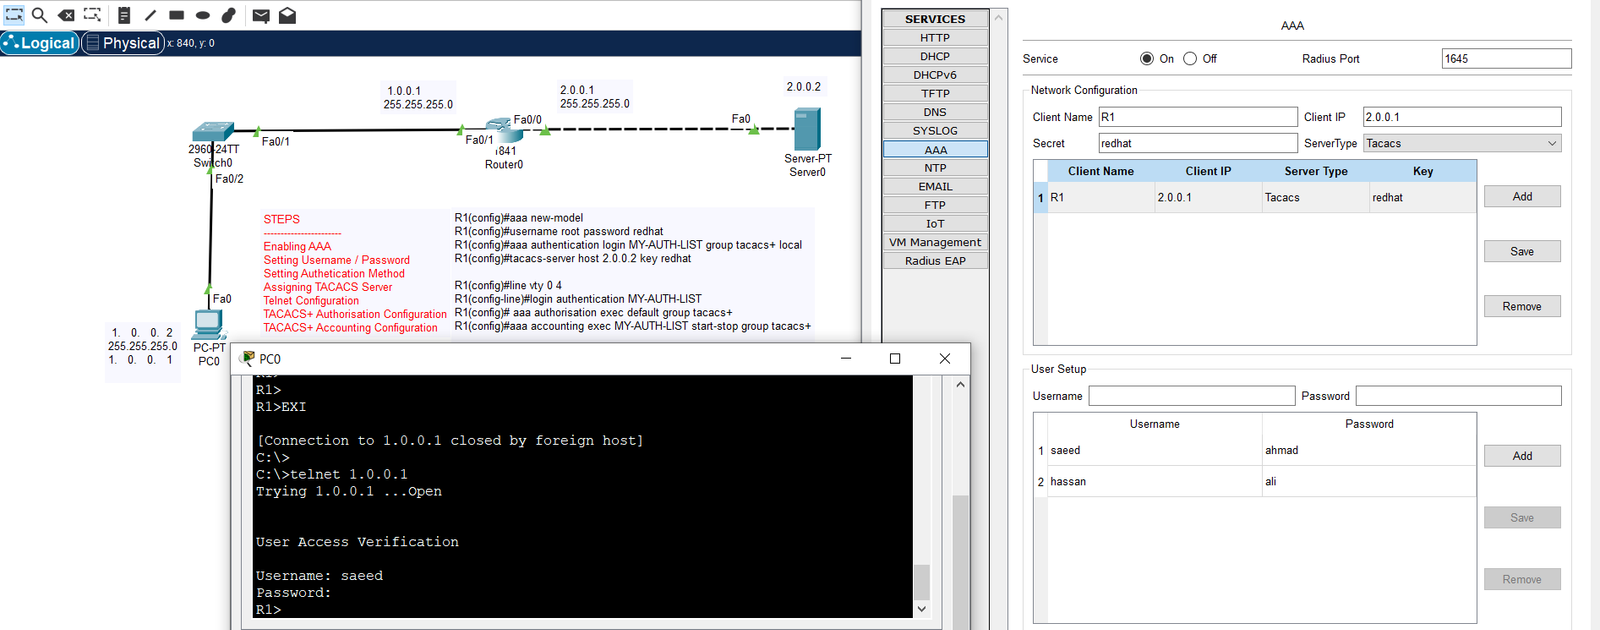
AAA & Security
AAA TACACS+ Configuration
View Lab
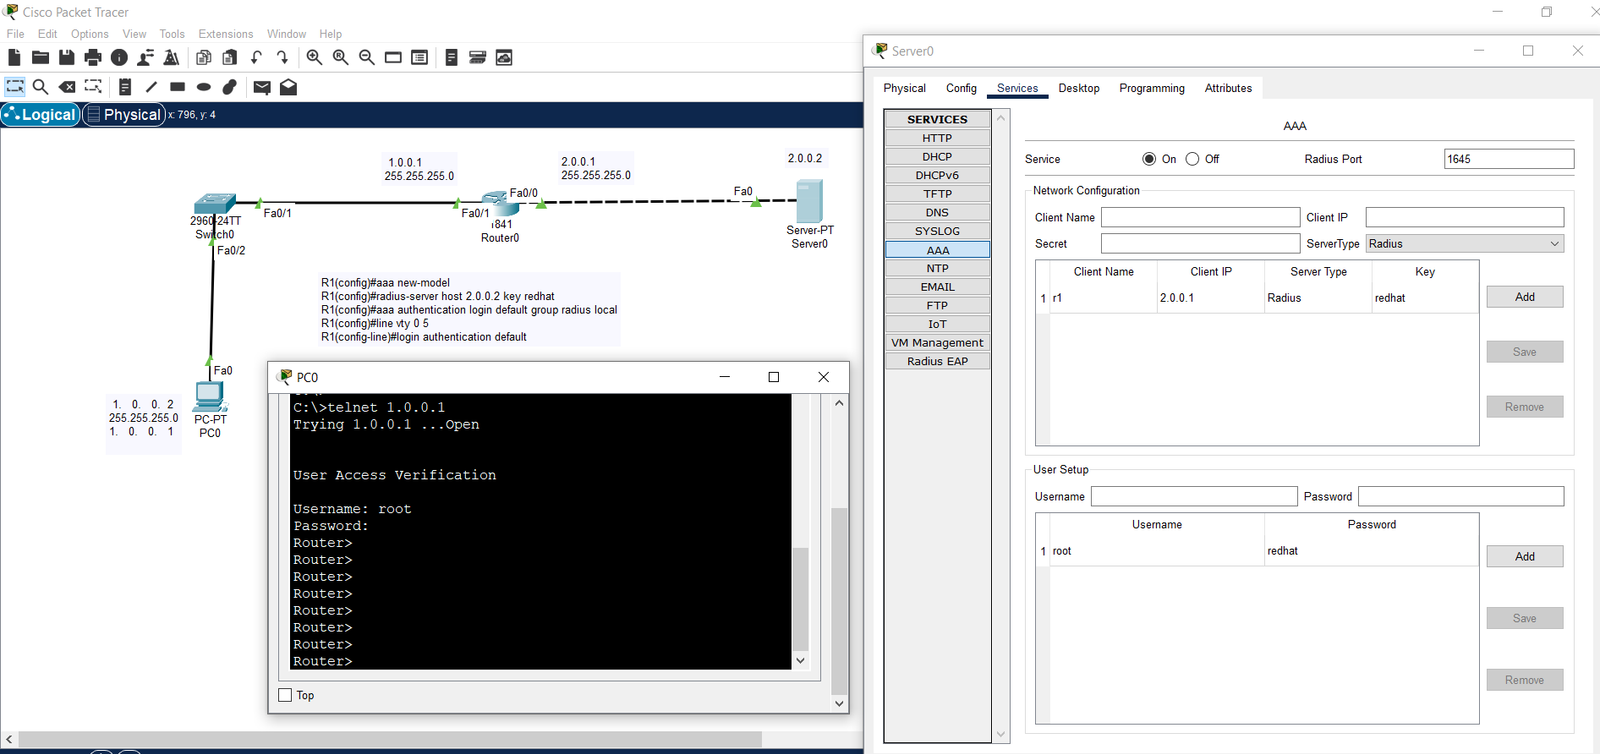
AAA & Security (figure 2)
Radius Server Lab
View Lab
AAA & Security (figure 3)
Password Recovery Lab
View Lab
AAA & Security (figure 4)
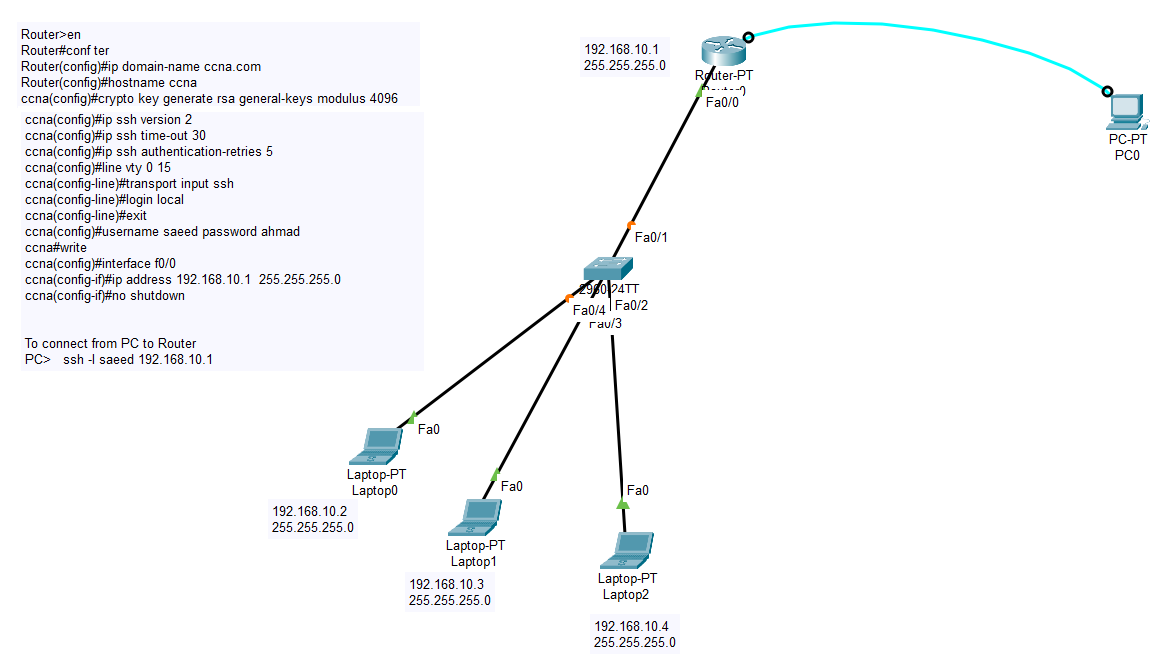
Basic SSH Lab
View Lab
AAA & Security (figure 5)
WLC Access Control
View Lab

Access Control Lists

Access Control Lists
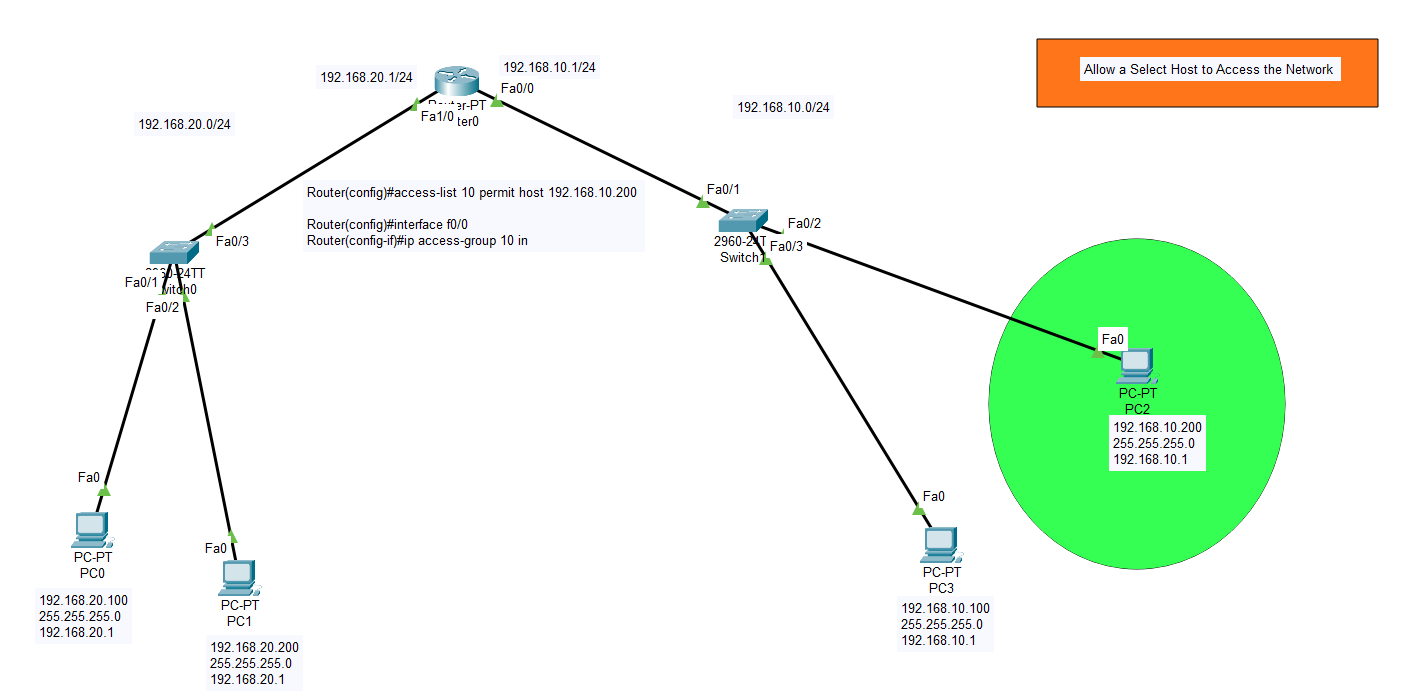
Allow Selected Host
View Lab
Access Control Lists (figure 2)
Host Network Access
View Lab
Access Control Lists (figure 3)
Deny Selected Host
View Lab
Access Control Lists (figure 4)
Network Access Restriction
View Lab
Access Control Lists (figure 5)
Block Web Traffic (Extended)
View Lab
Access Control Lists (figure 6)
Standard Named ACL Telnet
View Lab

Static Routing & Basics

Static Routing & Basics
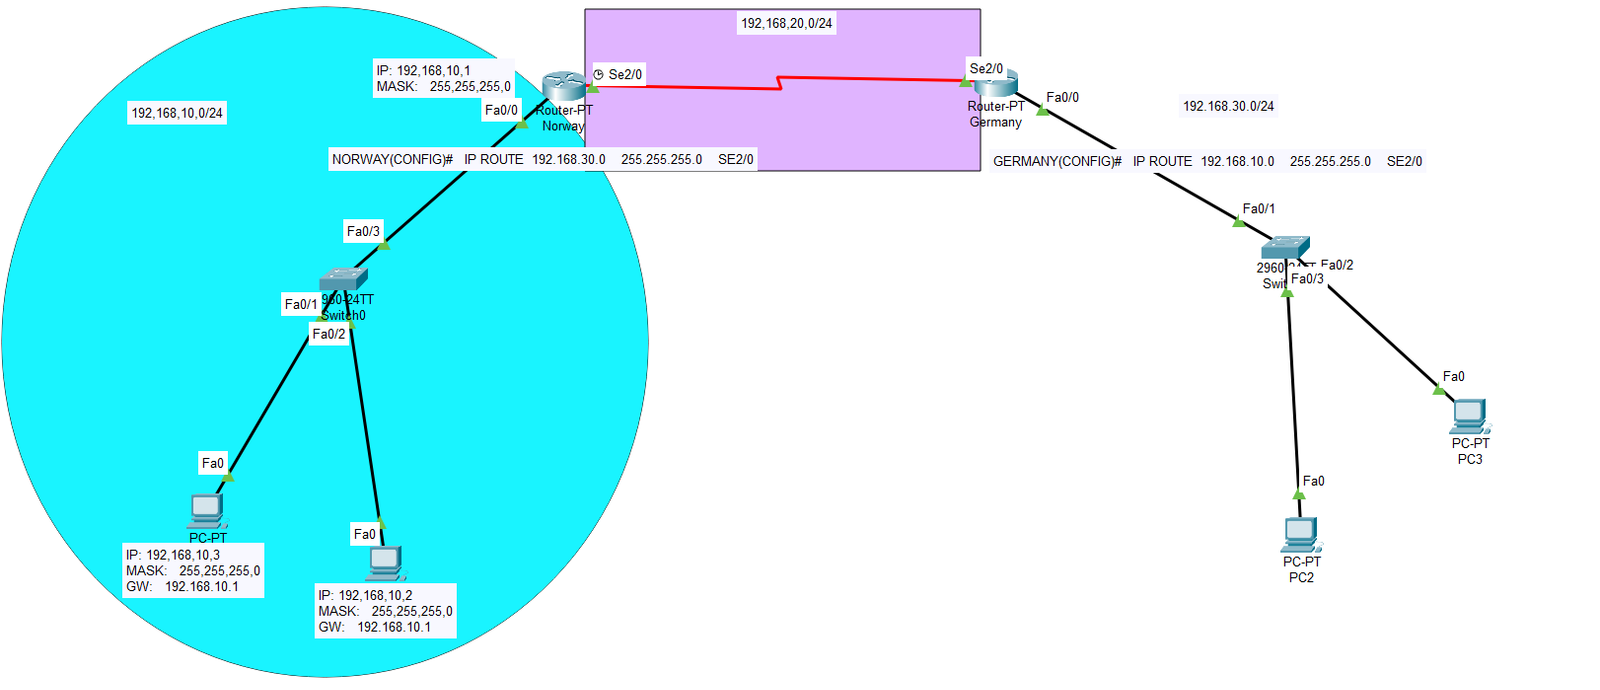
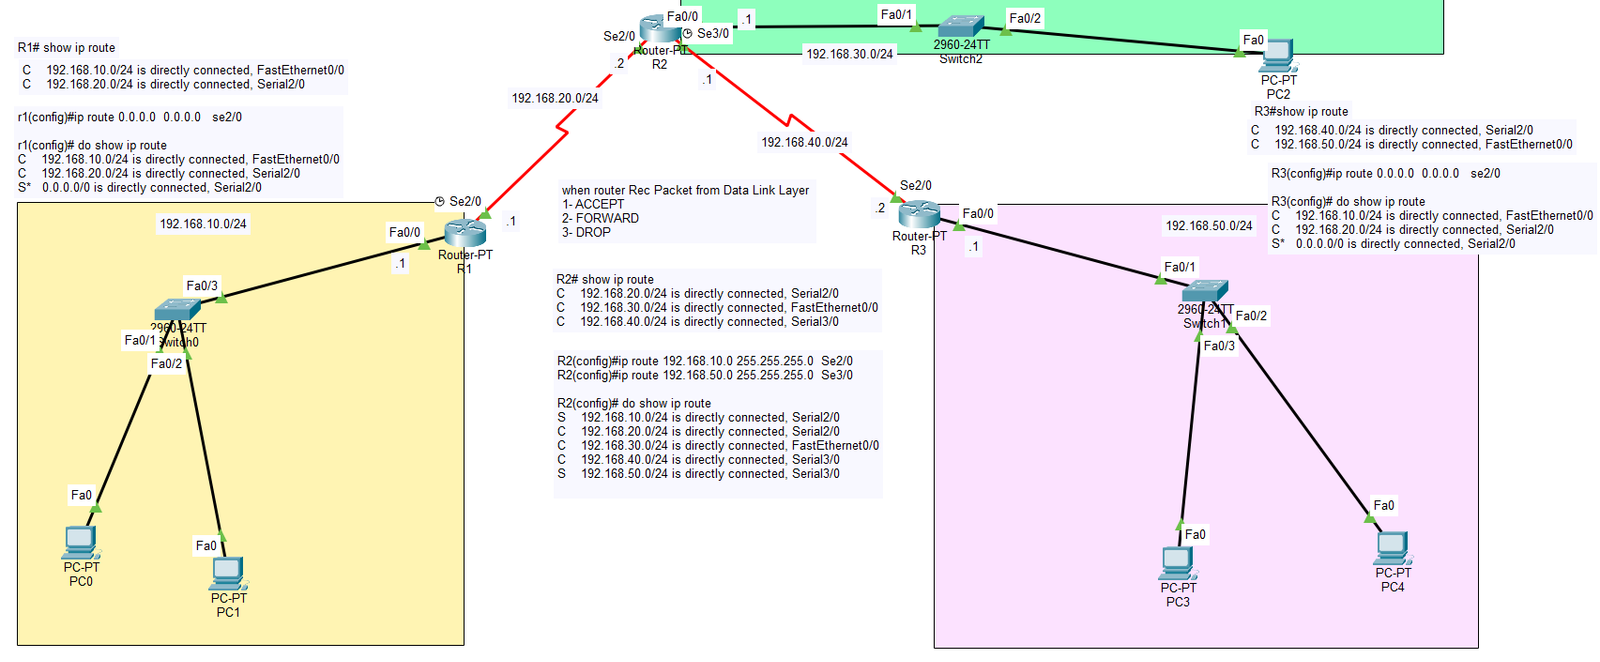
Static Route Fundamentals
View Lab
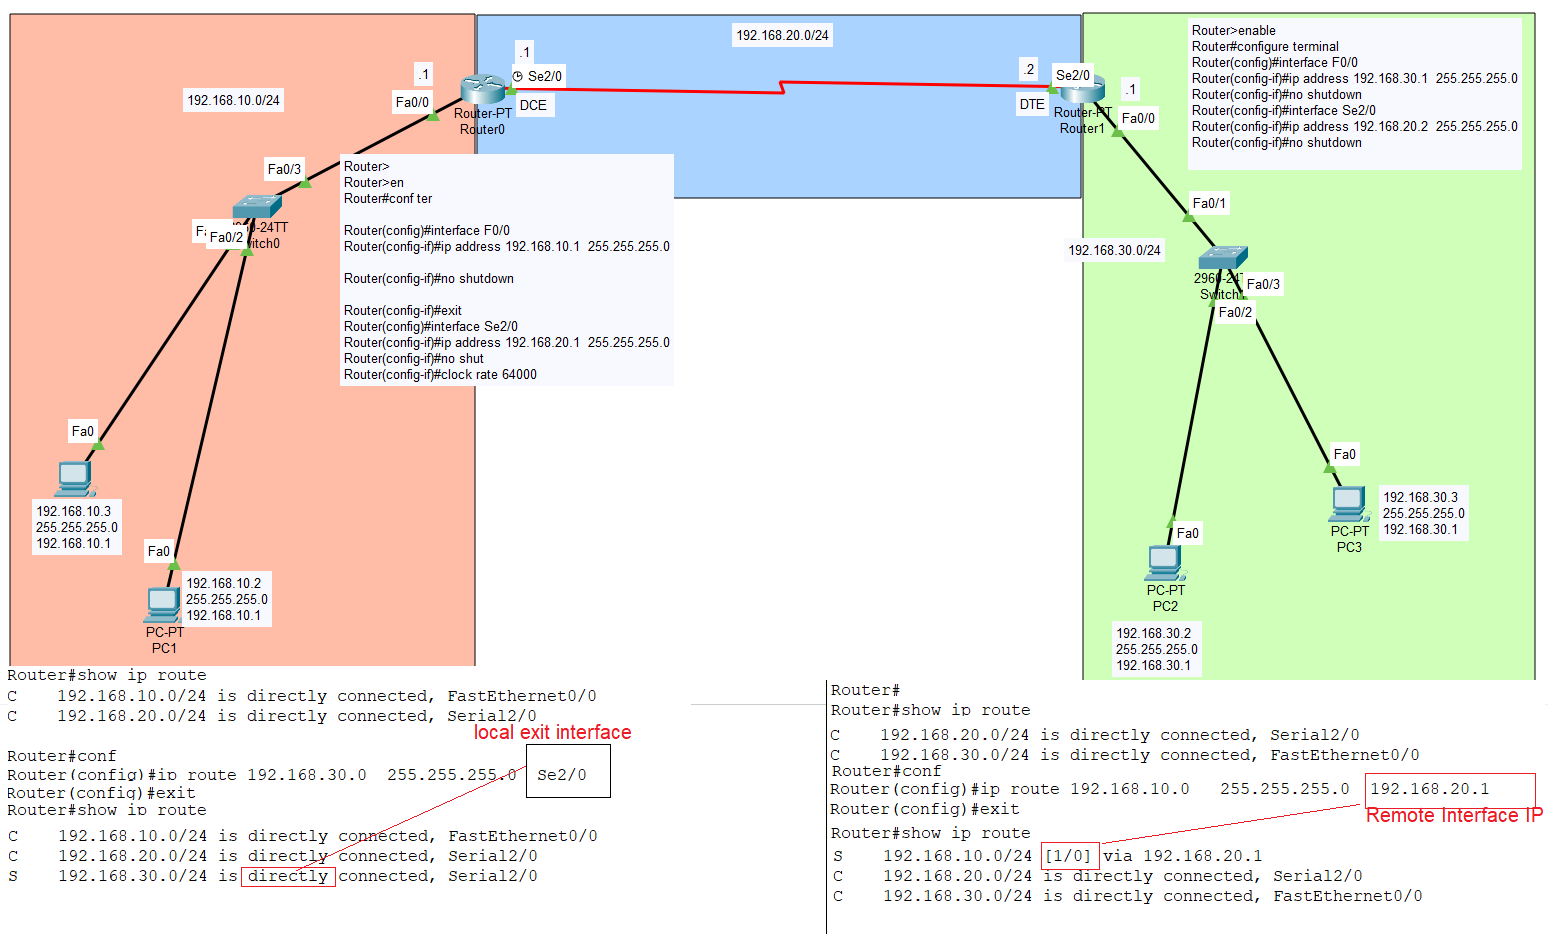
Static Routing & Basics (figure 2)
Static Route Concept Explanation
View Lab
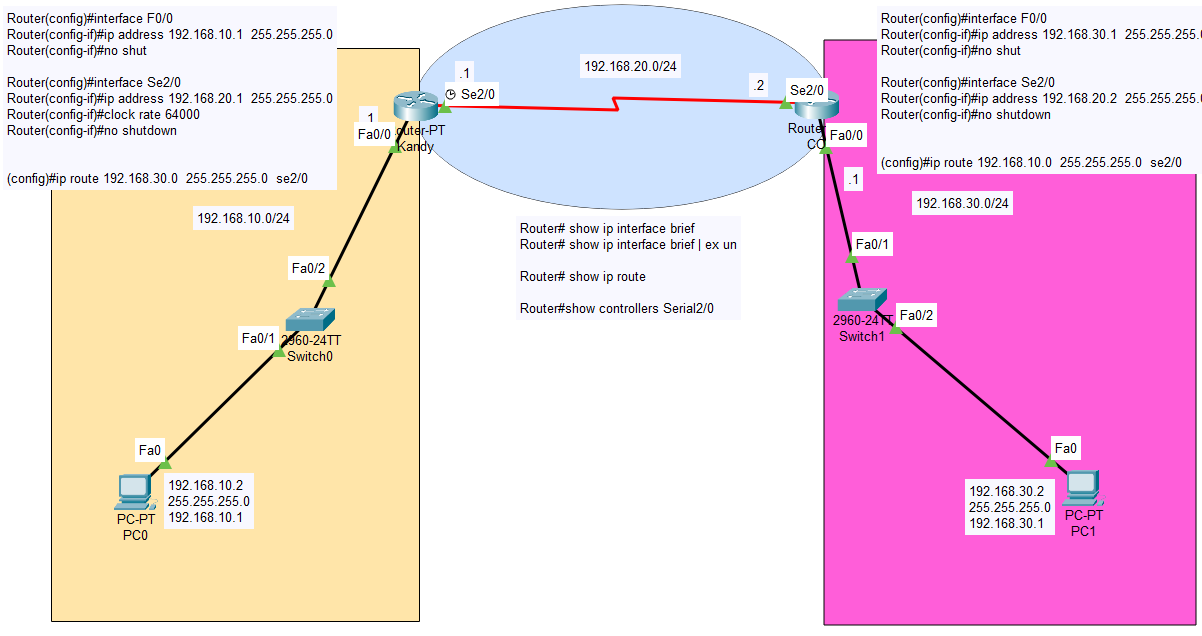
Static Routing & Basics (figure 3)
Static Routing (3 Networks)
View Lab
Static Routing & Basics (figure 4)
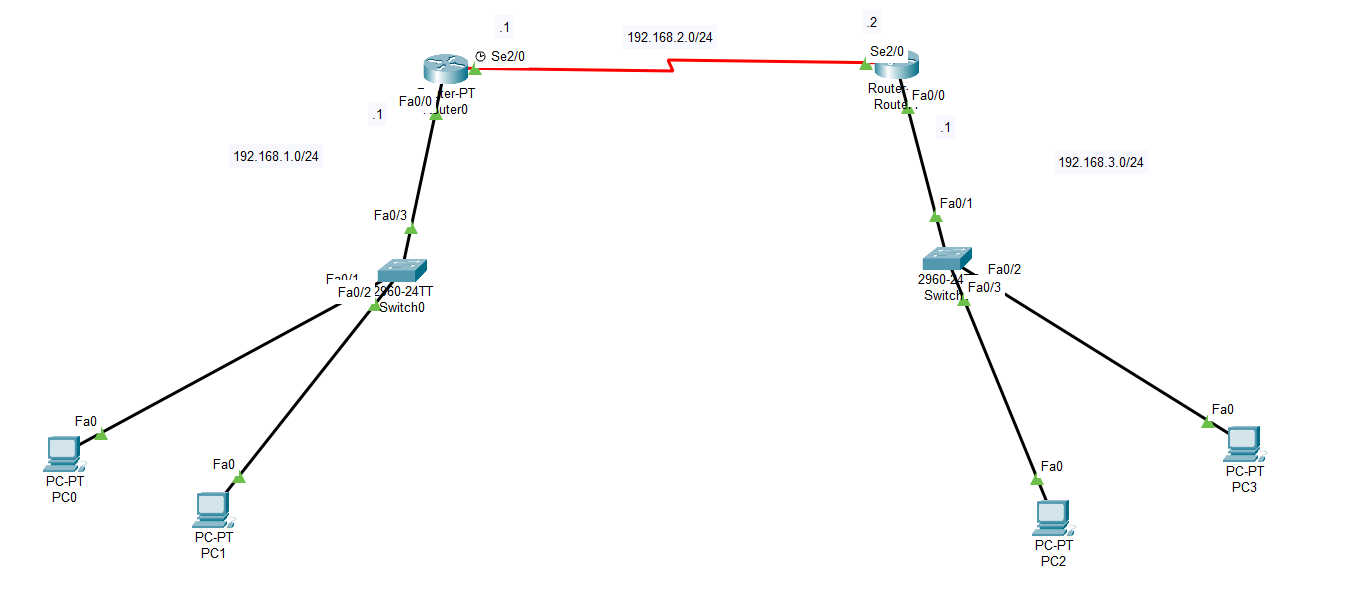
Static Routing Topology
View Lab
Static Routing & Basics (figure 5)
Default Static Route
View Lab
Static Routing & Basics (figure 6)
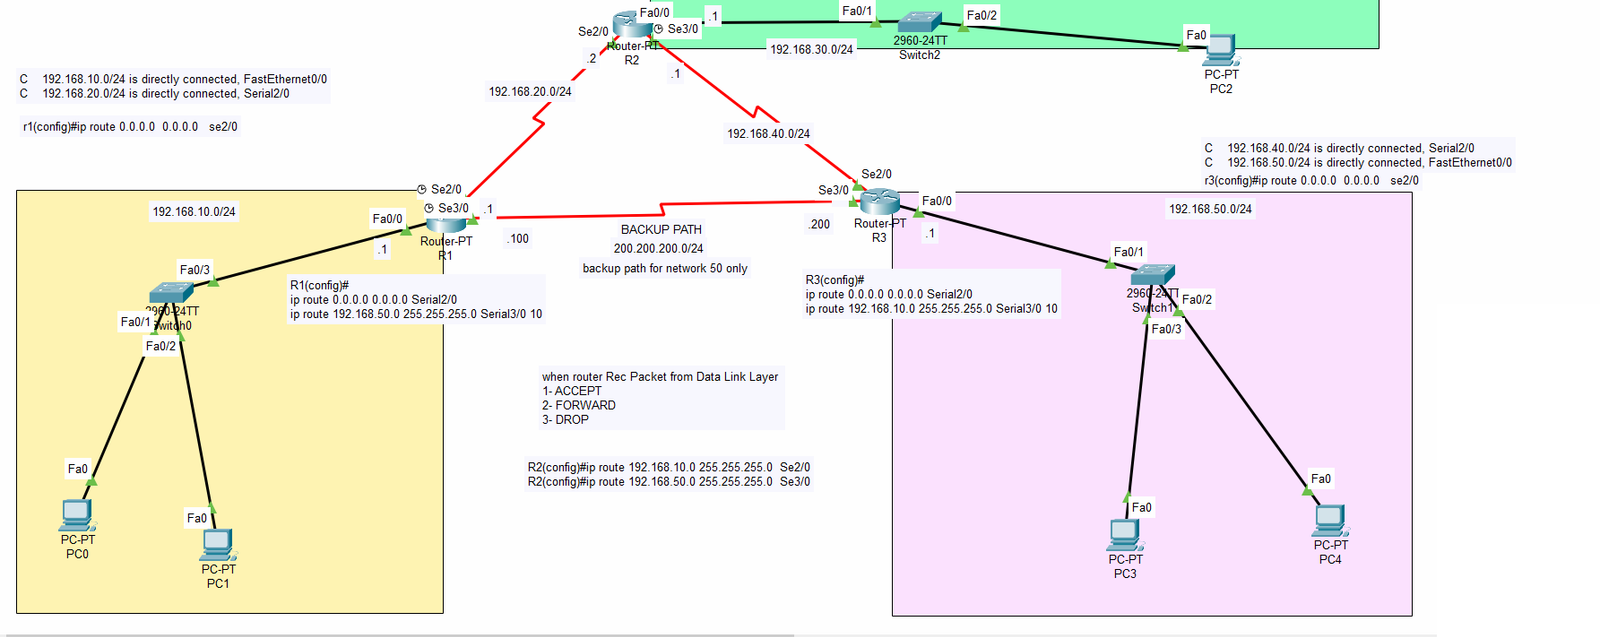
Floating Routes
View Lab
Static Routing & Basics (figure 7)
Floating Static Path
View Lab
Static Routing & Basics (figure 8)
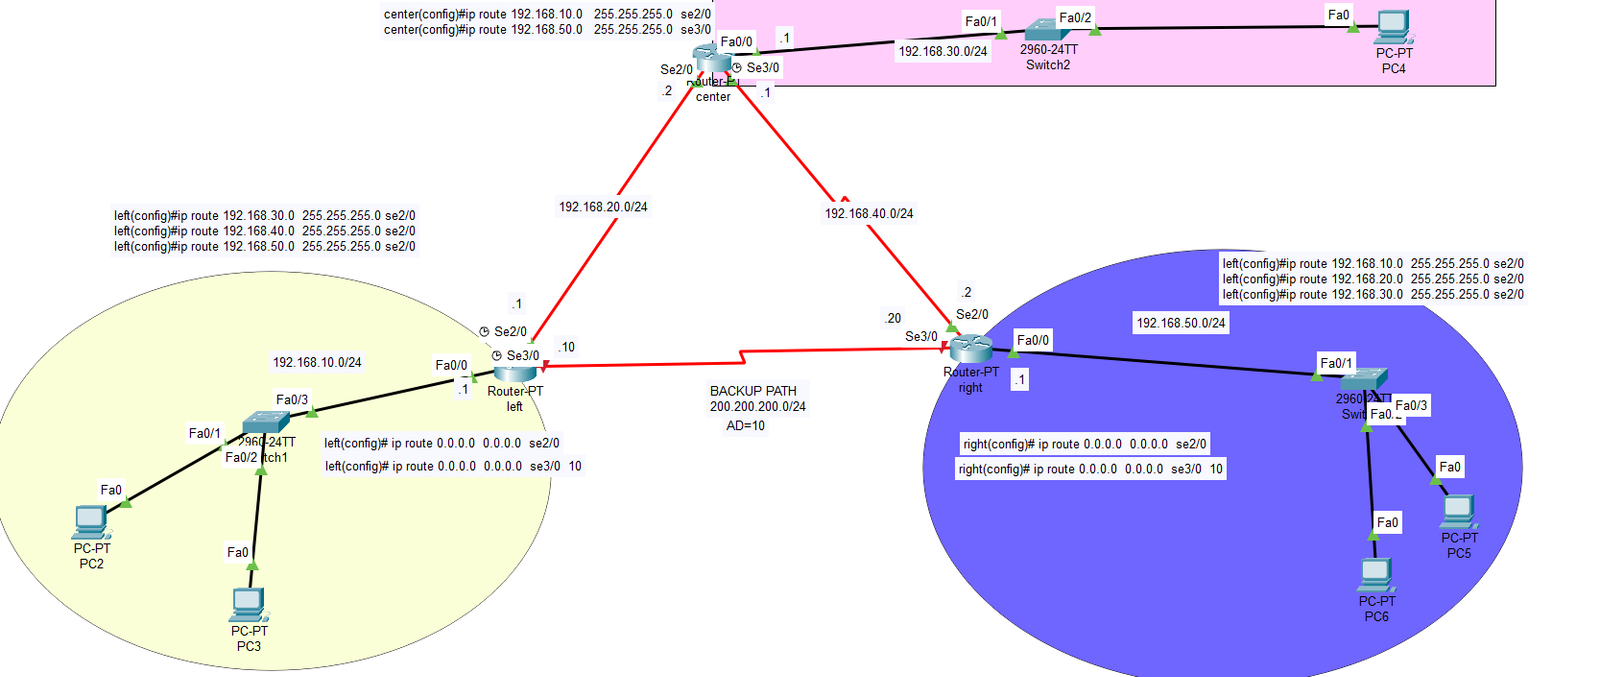
Floating Static Lab
View Lab
Static Routing & Basics (figure 9)
Static Floating Config
View Lab
Static Routing & Basics (figure 10)
Interface IP Assignment 1
View Lab
Static Routing & Basics (figure 11)
Basic Router Configuration
View Lab

VLAN & Switching

VLAN & Switching
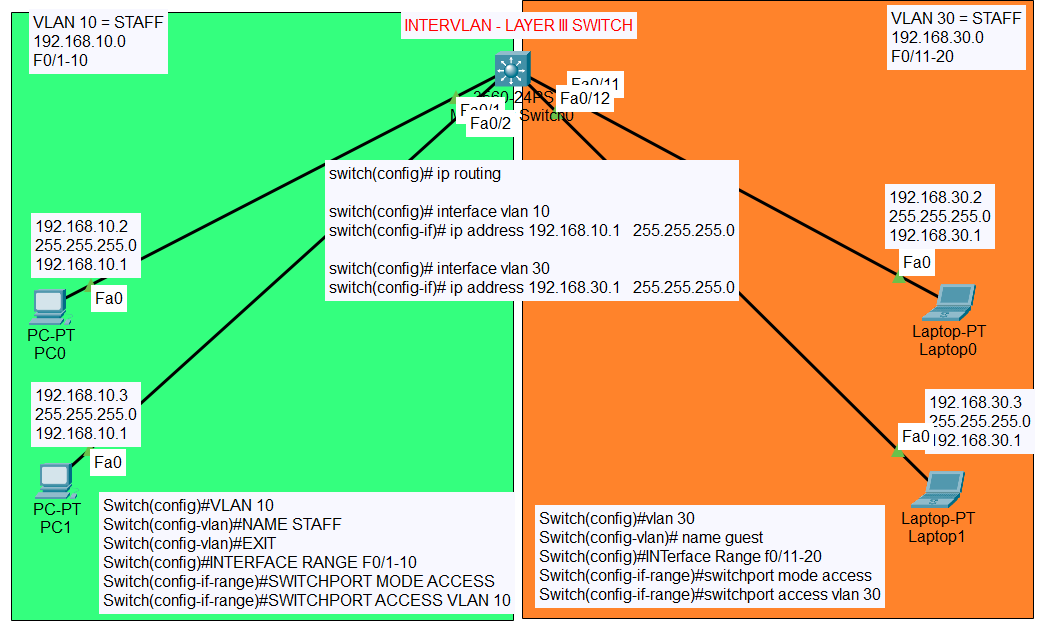
InterVLAN Routing
View Lab
VLAN & Switching (figure 2)
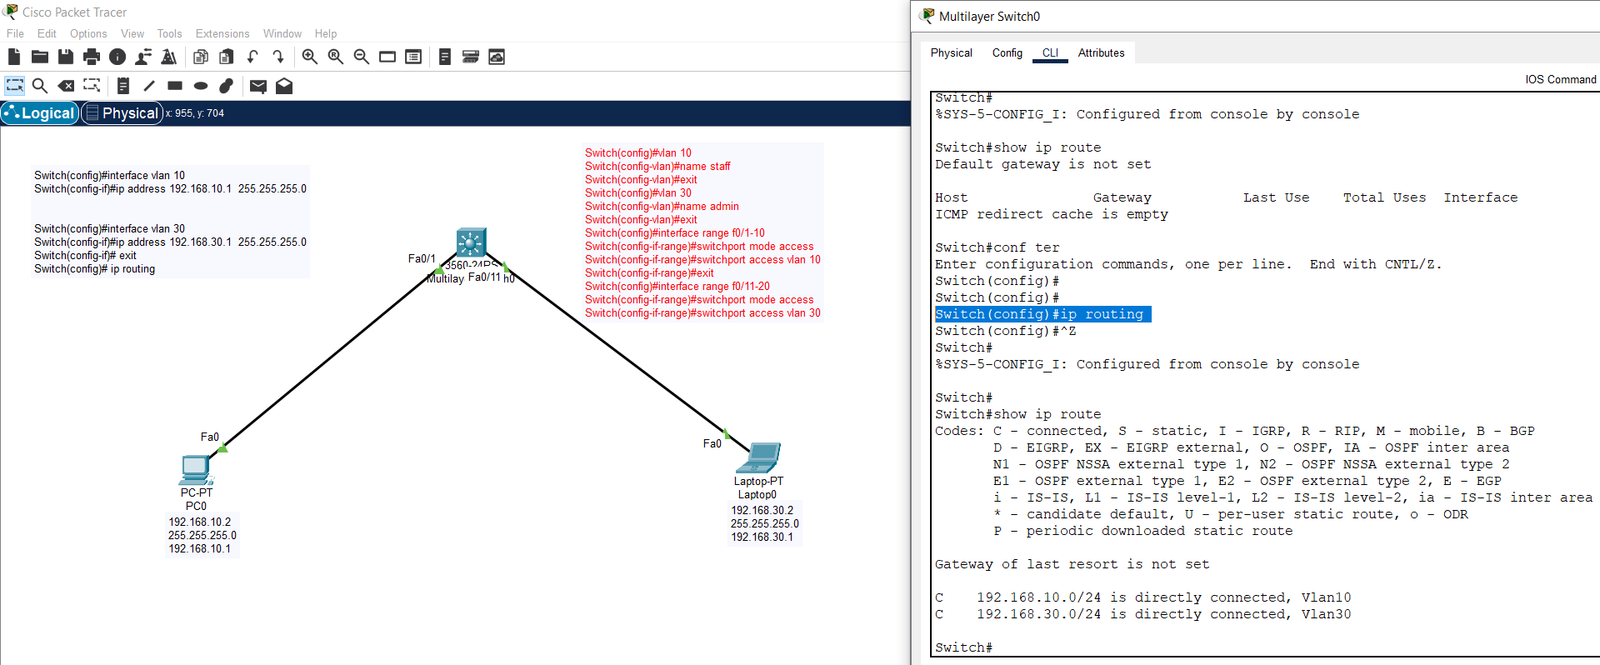
L3 Switch InterVLAN 1
View Lab
VLAN & Switching (figure 3)
L3 Switch InterVLAN 2
View Lab
VLAN & Switching (figure 4)
L3 Switch InterVLAN 3
View Lab
VLAN & Switching (figure 5)
Layer III Switch Routing
View Lab
VLAN & Switching (figure 6)
Router-on-a-Stick Best
View Lab
VLAN & Switching (figure 7)
Per VLAN Router Interface
View Lab
VLAN & Switching (figure 8)
Per VLAN Routing Lab
View Lab
SVI Interface Lab
View Lab
VLAN & Switching (figure 9)
SVI Configuration
View Lab
VLAN & Switching (figure 10)
VTP Configuration
View Lab
VLAN & Switching (figure 11)
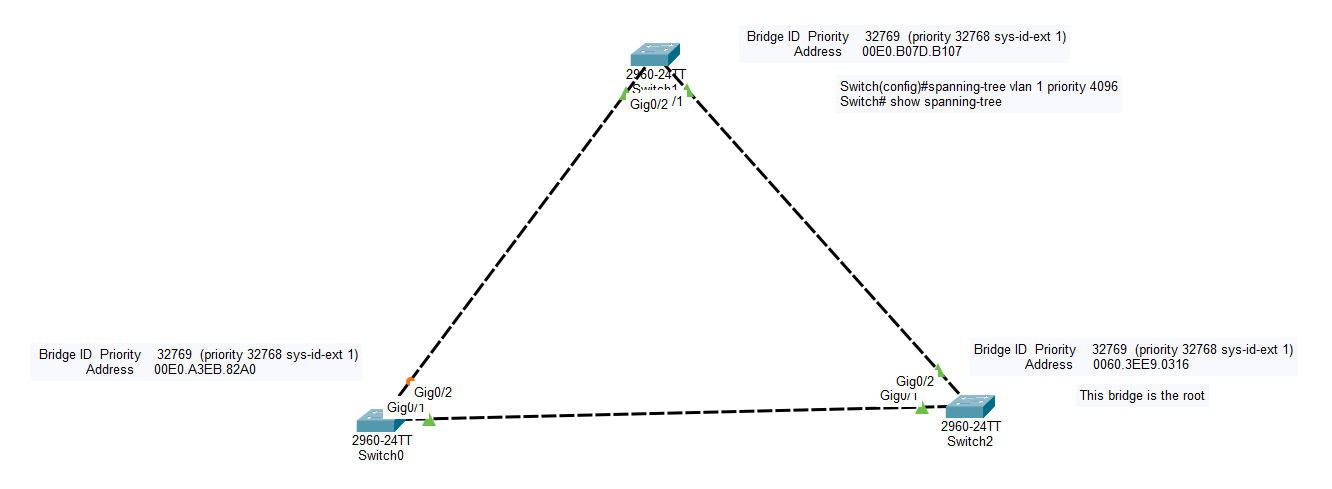
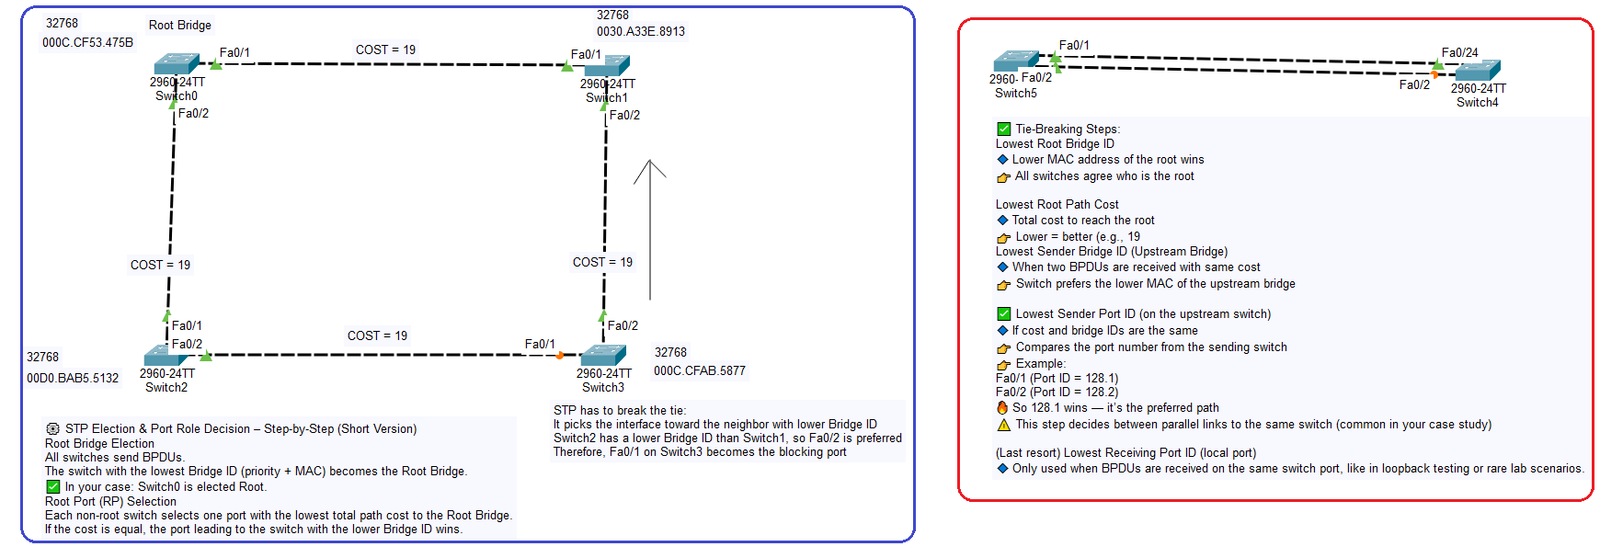
Spanning Tree Protocol
View Lab
VLAN & Switching (figure 12)
STP Case Study
View Lab
VLAN & Switching (figure 13)
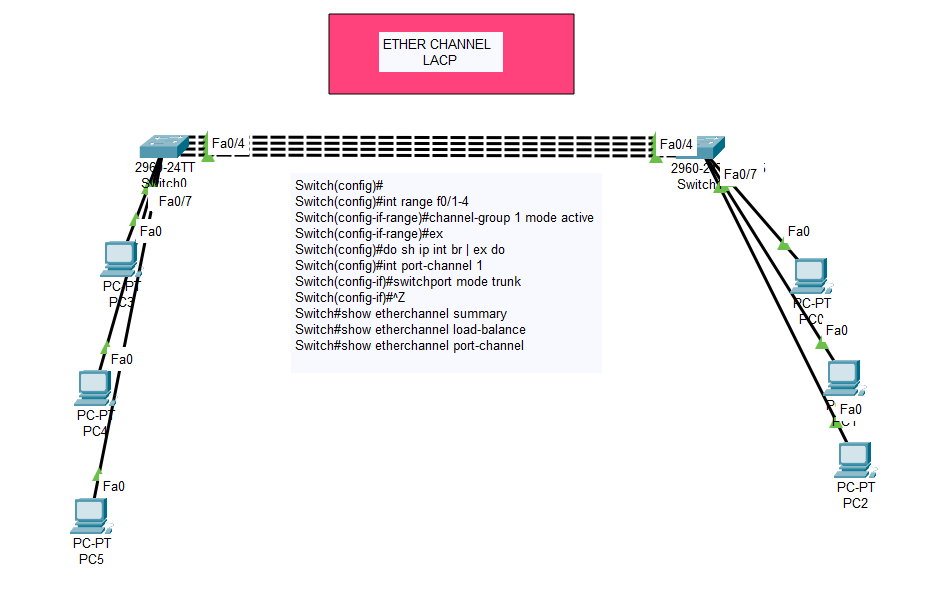
EtherChannel LACP
View Lab
VLAN & Switching (figure 14)
EtherChannel LACP 01
View Lab
VLAN & Switching (figure 15)
LACP Practice Lab
View Lab

OSPF Routing

OSPF Routing
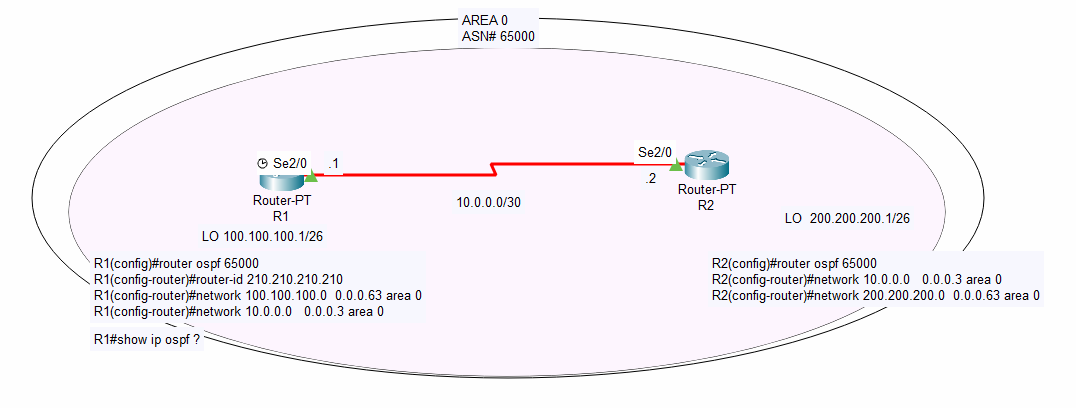
OSPF Configuration
View Lab
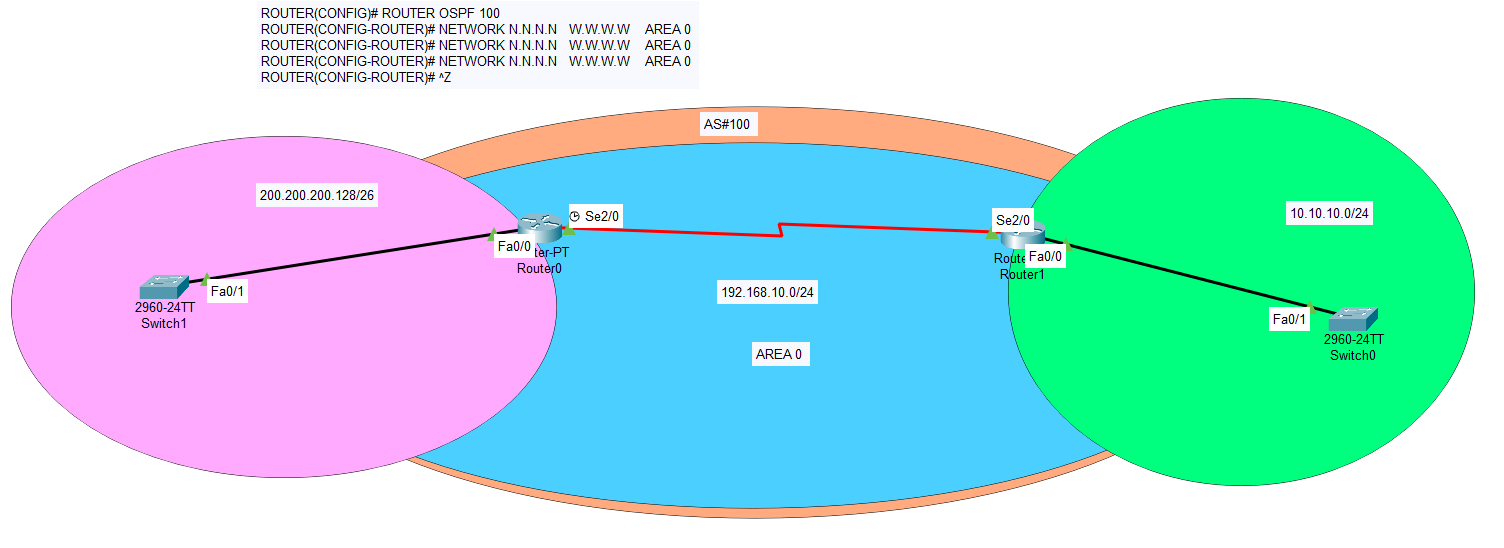
OSPF Routing (figure 2)
OSPF Practical Lab
View Lab
OSPF Routing (figure 3)
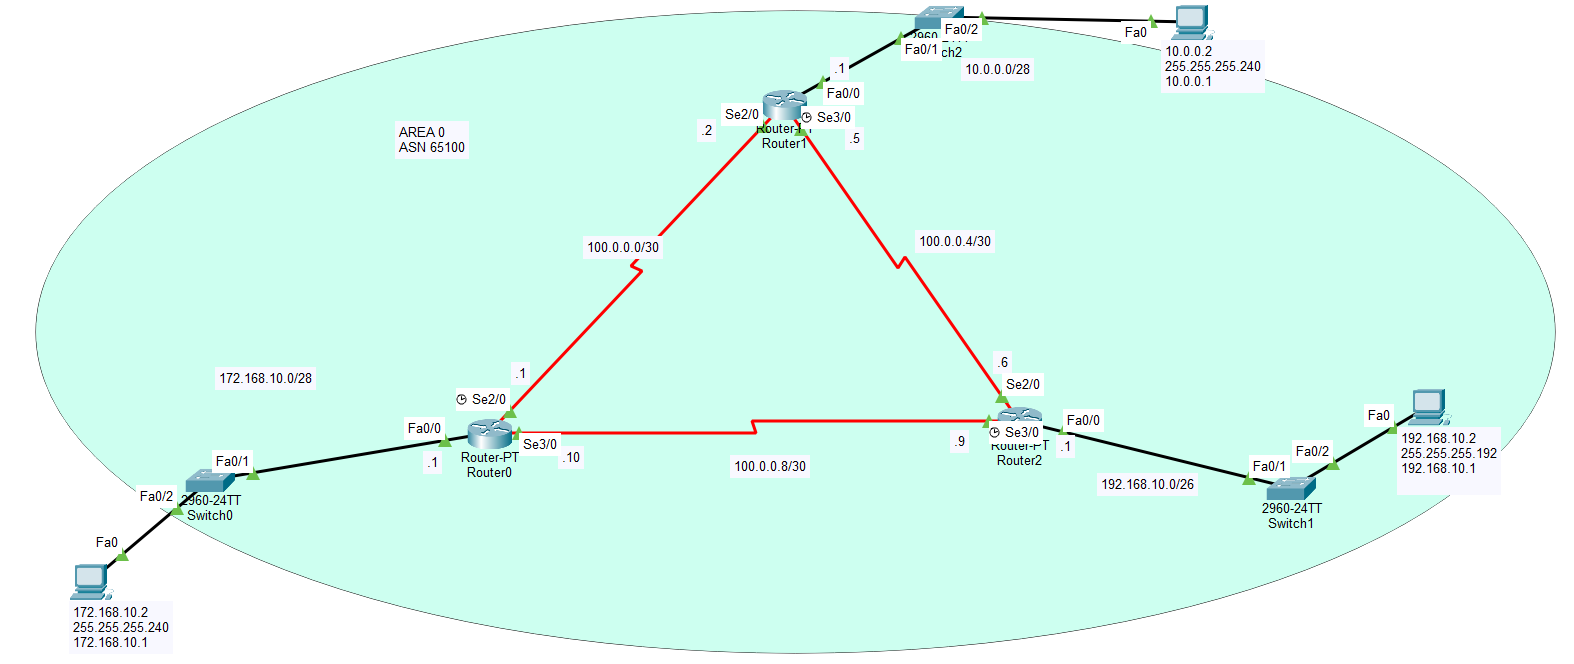
OSPF Assignment
View Lab
OSPF Routing (figure 4)
OSPF Interface Level
View Lab
OSPF Routing (figure 5)
OSPF Router Mode
View Lab

IP Services & Management

IP Services & Management
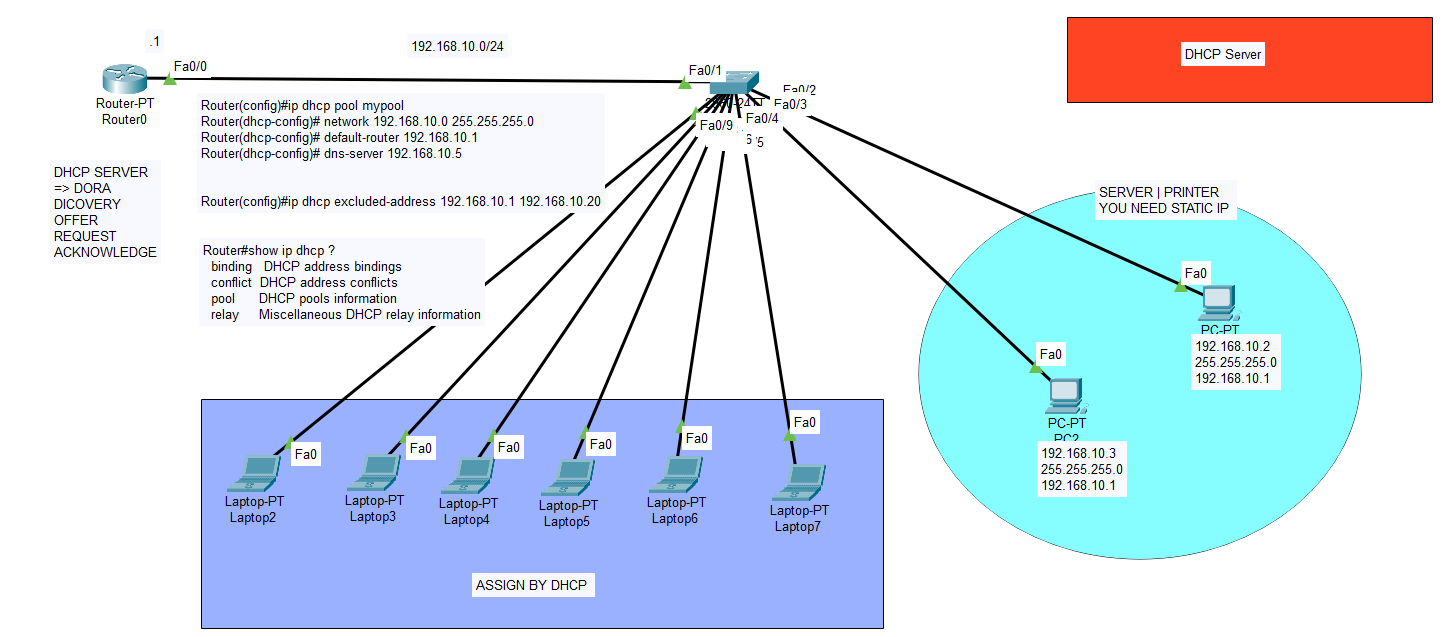
DHCP Lab
View Lab
IP Services & Management (figure 2)
DHCP Syslog
View Lab
IP Services & Management (figure 3)
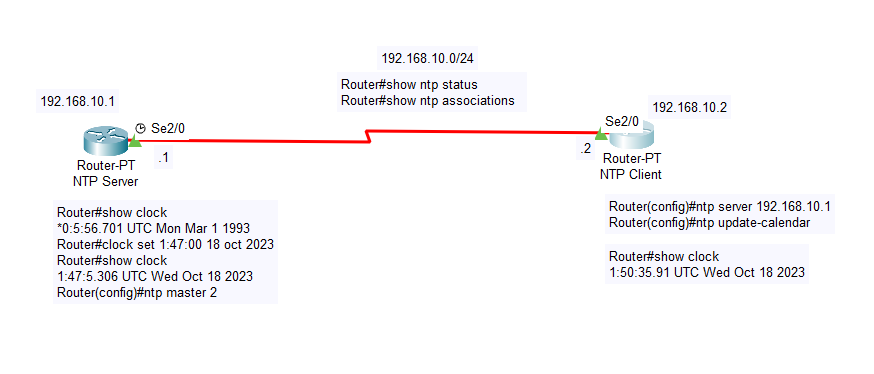
NTP Server Lab
View Lab
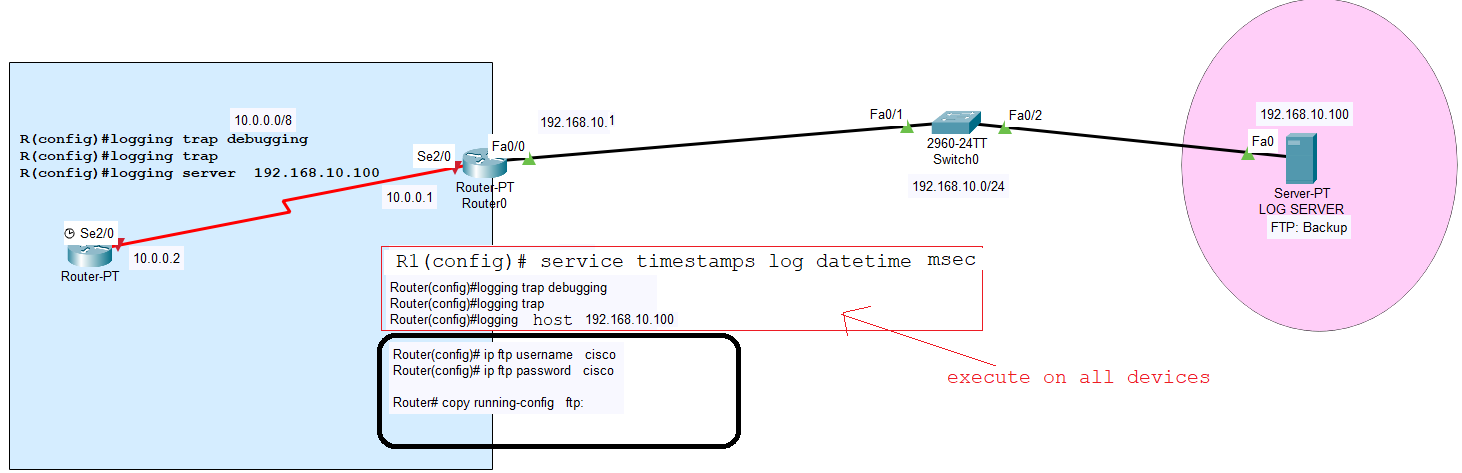
SYSLOG Monitoring
View Lab
IP Services & Management (figure 4)
SYSLOG & FTP
View Lab
FTP Backup Lab
View Lab
IP Services & Management (figure 5)
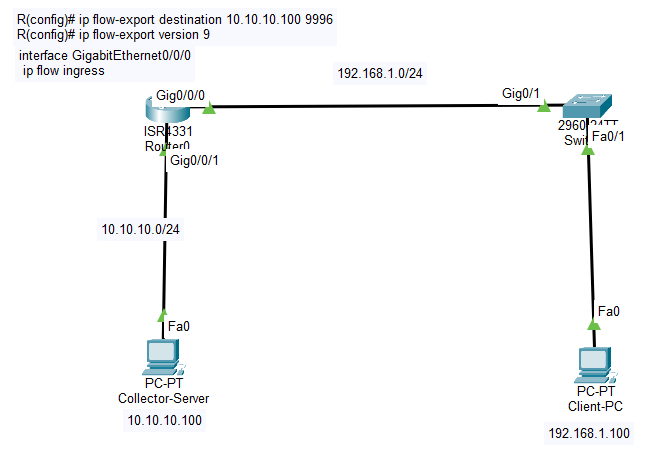
Netflow Collector
View Lab
IP Services & Management (figure 6)
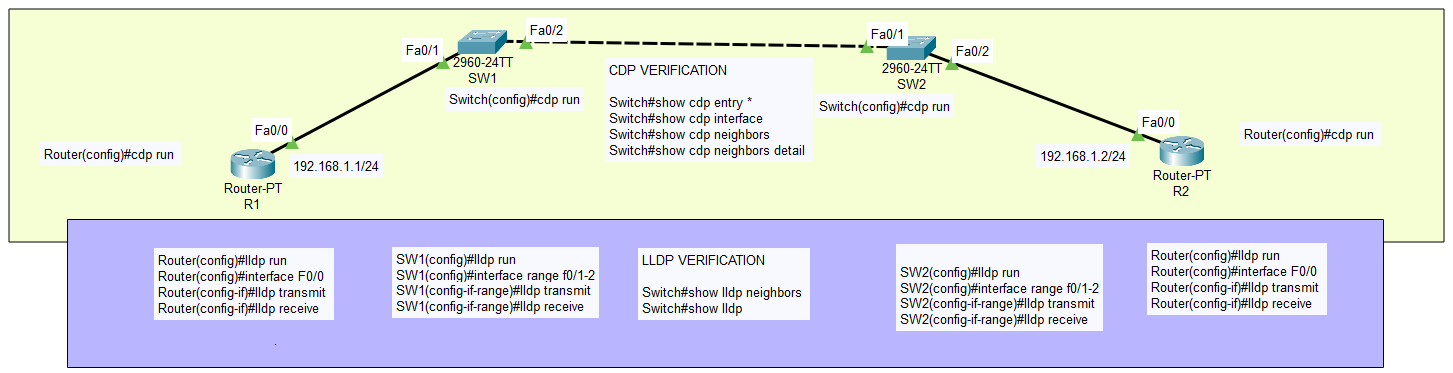
LLDP & CDP Discovery
View Lab

Redundancy & VPN

Redundancy & VPN
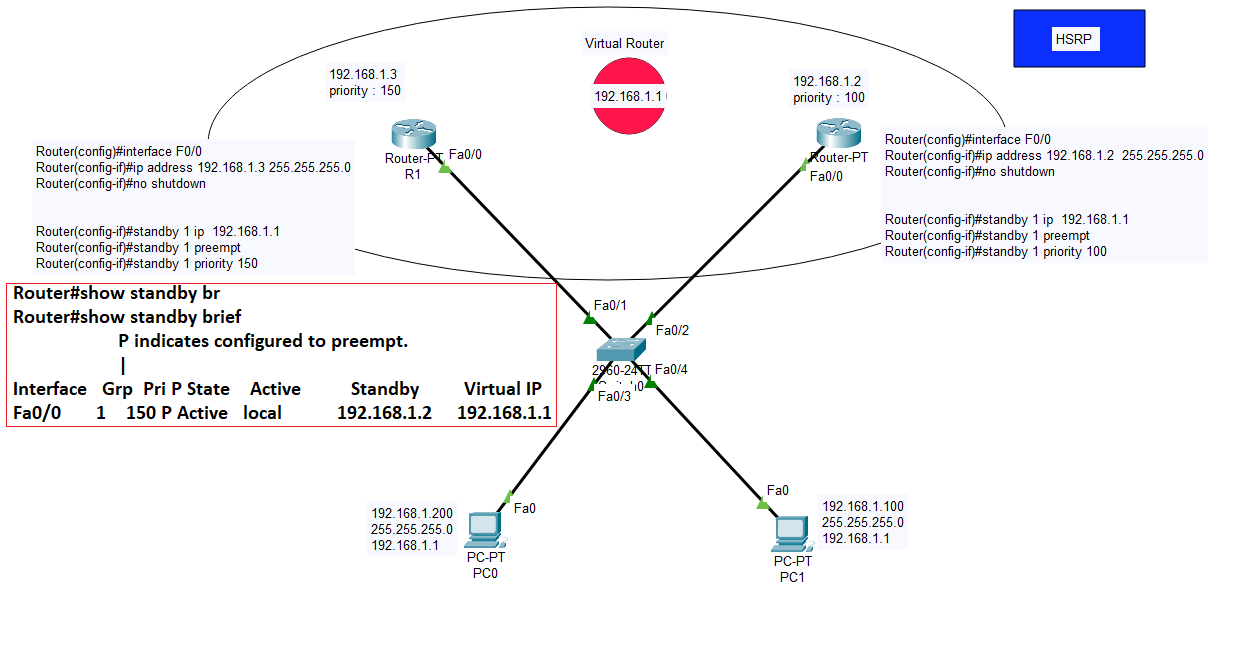
HSRP Config 01
View Lab
Redundancy & VPN (figure 2)
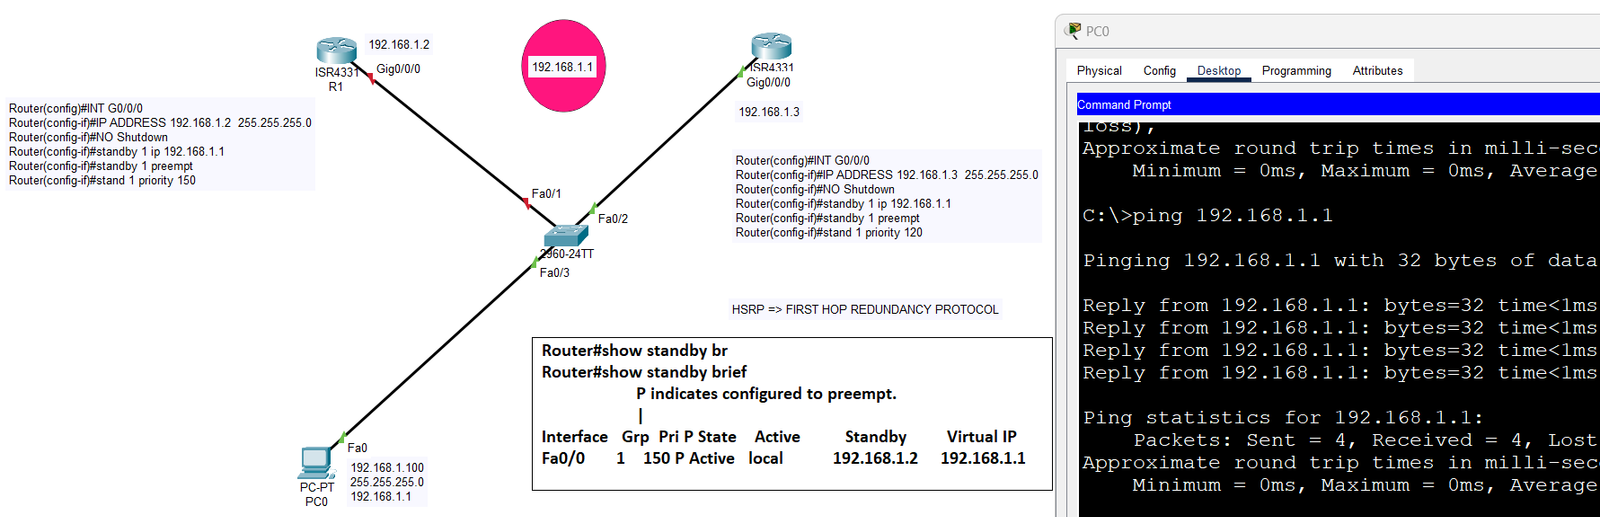
HSRP Config 02
View Lab
Redundancy & VPN (figure 3)
IPSec VPN & NAT
View Lab

General & Mixed Labs

General & Mixed Labs
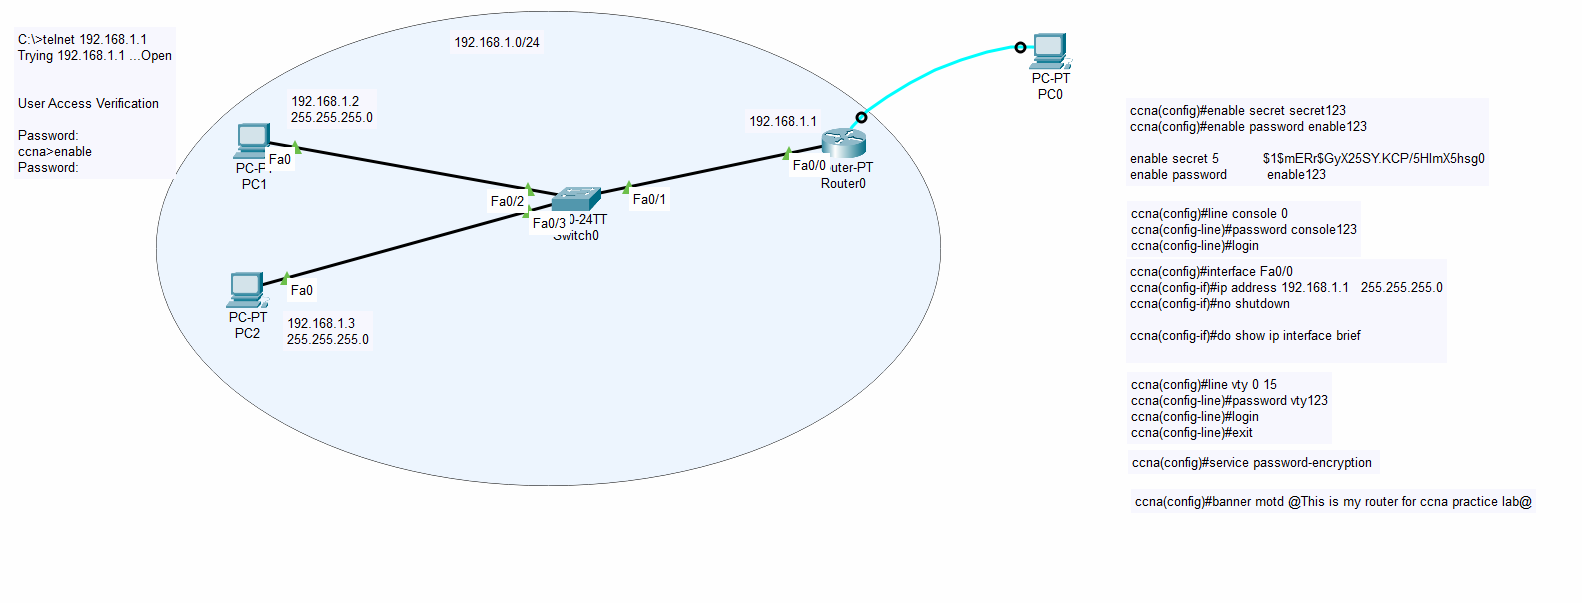
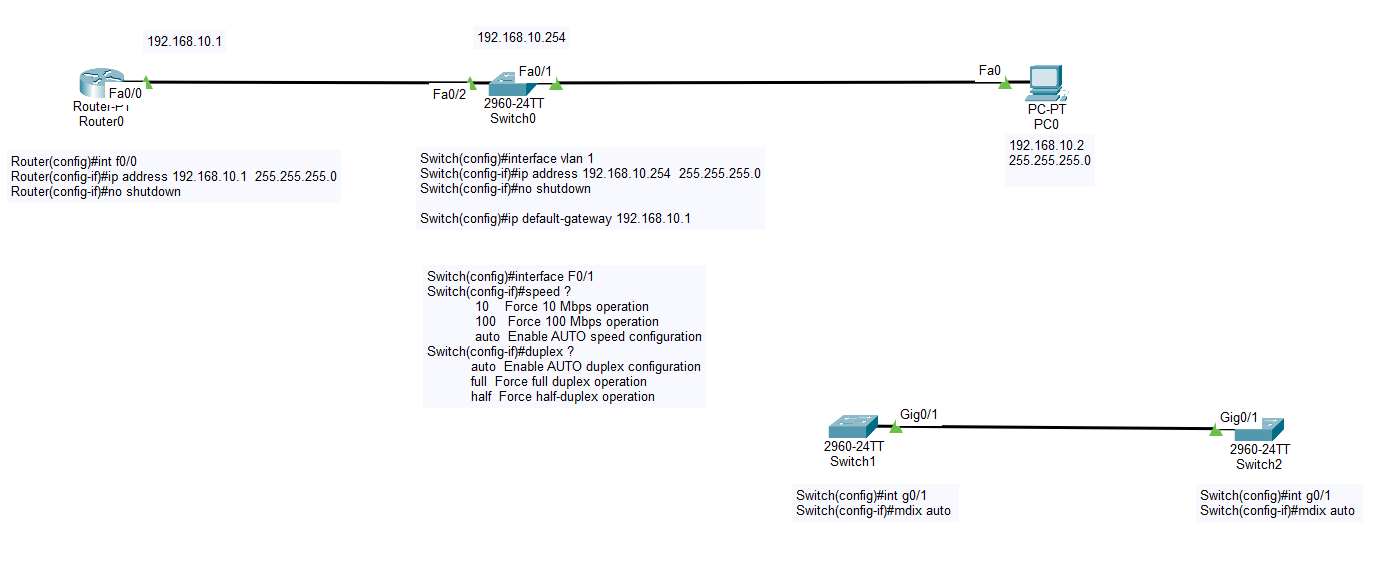
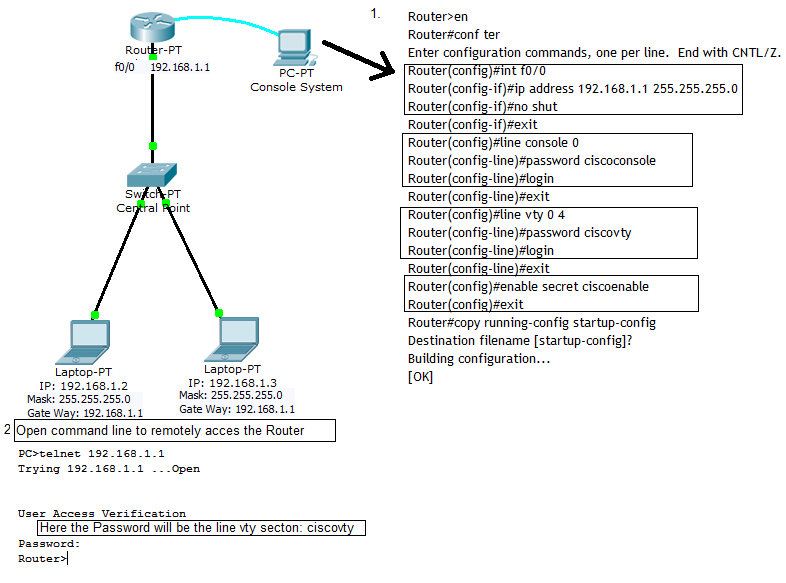
Telnet Practice Lab
View Lab
Modules (1) ← CCNA — Hands-on Labs